Table of Contents
Ever looked around your home and thought, "This could be better," but felt stuck? Forget expensive renovations and endless trips to the hardware store. What if I told you that you could whip up custom solutions with your own two hands, or rather, your own 3D printer? That's the magic of home improvement 3D prints. We’re not talking about flimsy trinkets here, but rather practical, stylish, and downright useful items to spruce up your space. From quirky wall hooks to custom-fitted drawer organizers, the possibilities are as limitless as your imagination. This article will guide you through the exciting world of 3D-printed home upgrades. We'll explore some cool project ideas, demystify the process of bringing your designs to life, and give you the lowdown on the tools and materials you'll need. Plus, we'll tackle some common issues that might pop up, so you can become a 3D printing pro in no time. So, grab your digital design hat and let’s turn those home improvement dreams into reality, one 3D print at a time!
Cool Home Improvement 3D Prints You Can Make
Cool Home Improvement 3D Prints You Can Make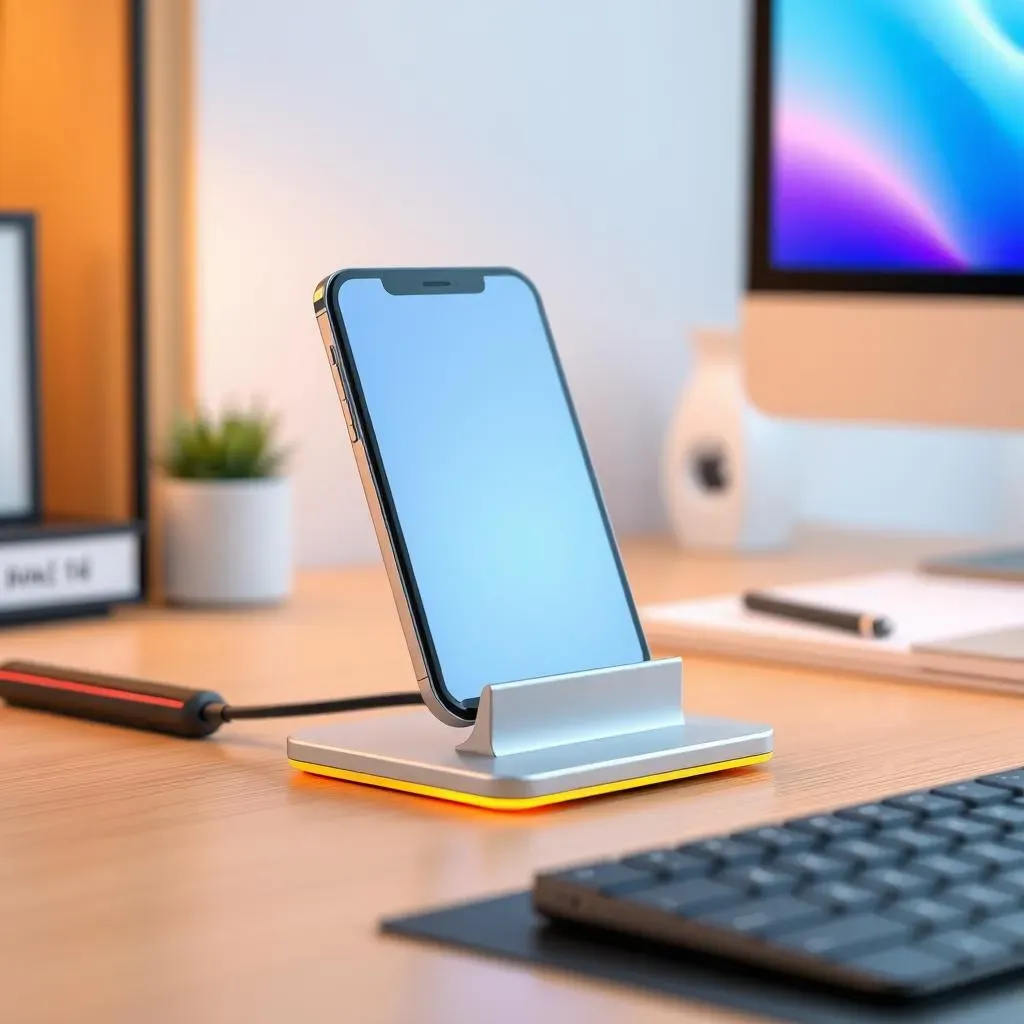
Functional and Fun: Upgrades You'll Love
Okay, so you've got a 3D printer, now what? Forget those boring, generic plastic things you see online. Let's talk real, usable stuff, the kind of upgrades that make you wonder how you ever lived without them. Think about it, custom-designed cable clips to tame that spaghetti monster behind your desk, or maybe a perfectly sized phone stand that fits your device like a glove. I once printed a set of wall-mounted spice racks that finally freed up counter space. They were way better than anything I could find at the store! It’s about making life easier and adding a touch of "you" to every corner of your home.
And it's not just about function. How about adding some flair? 3D-printed vases in wild geometric shapes, quirky doorknobs that start conversations, or even personalized coasters that show off your unique style. I saw someone print a whole set of tiny planters shaped like animals, and they were absolutely adorable. It's about those little details that make your space feel special. Plus, you get the satisfaction of saying, "Yeah, I made that!" when someone asks where you got it. It's a great way to show off your creativity and impress your friends, and who doesn't want that?
Project | Function | Fun Factor |
|---|---|---|
Cable Clips | Organize cables | Tames the chaos |
Phone Stand | Holds your phone | Customizable |
Spice Racks | Organize spices | Saves counter space |
Vases | Holds flowers | Unique designs |
Coasters | Protects surfaces | Personalized |
Beyond the Basics: Unique Ideas
Ready to go beyond the usual? How about 3D-printed molds for concrete planters? I made one shaped like a skull, and it became the centerpiece of my patio. Or maybe you could create custom drawer dividers that perfectly fit your silverware, or perhaps even print a set of replacement parts for that old appliance that’s been gathering dust. I even saw someone on a forum who designed and printed a replacement handle for their broken fridge! The point is, if you can dream it, you can probably print it. It's all about thinking outside the box and using your printer to solve those pesky little home problems.
And let’s not forget about lighting! You could print lamp shades with custom patterns that cast unique shadows, or even create your own string light diffusers. I once designed a lamp shade that looked like a miniature geodesic dome. It was a total conversation starter when people came over. The beauty of 3D printing is that you can constantly experiment and tweak your designs until they’re just right. It’s like having a mini factory right in your home, capable of turning your wildest ideas into tangible objects. It's a whole new way to think about home improvement and personalization.
- Concrete Molds
- Drawer Dividers
- Replacement Parts
- Custom Lampshades
- String Light Diffusers
Home Improvement 3D Prints: From Idea to Reality
Home Improvement 3D Prints: From Idea to Reality
From Brainstorm to Build: Planning Your Print
Alright, so you've got this brilliant idea for a 3D-printed home upgrade, that’s awesome! But before you hit that print button, let’s talk planning. It’s like any project, a little prep goes a long way. Start by sketching out your idea, even if it’s just a rough drawing on a napkin. Think about the dimensions, the functionality, and how it will fit into your space. I like to use a simple 3D modeling software to get a better visual, but if you're just starting out, paper and pencil work perfectly fine too. It's really about getting that vision out of your head and onto something tangible. The more details you nail down at this stage, the smoother the printing process will be.
Next up, consider your material. Are you going for a sturdy, functional piece that needs to withstand some wear and tear? Or is it more of a decorative item that just needs to look good? Different materials like PLA, ABS, and PETG have different properties, so choose wisely. I once printed a set of outdoor hooks using PLA, and they warped in the sun. Lesson learned – use the right material for the job! It's all about understanding what each material is good at. Think of it like choosing the right tool for a job; you wouldn’t use a hammer to screw in a nail, right? Same thing with 3D printing materials.
Making it Real: Printing and Post-Processing
Okay, you've planned, you've chosen your material, now for the fun part – printing! Load up your 3D model into your slicer software, adjust your settings (layer height, infill, speed), and get ready to watch the magic happen. I still get a kick out of seeing the printer lay down the first layer. It's like watching your idea slowly materialize in front of your eyes. But don’t just walk away; keep an eye on it, especially during the first few layers, to make sure everything is going smoothly. Sometimes a little adjustment is needed to avoid a print failure. It's like baking a cake; you don't just stick it in the oven and forget about it, you check on it to make sure it's not burning, right? Same deal with 3D printing.
Once your print is finished, it’s time for post-processing. This might involve removing support structures, sanding down rough edges, or even painting your print to achieve the desired look. I find that a bit of sanding and a coat of paint can really elevate a 3D print from looking like a plastic toy to a professional-looking home accessory. It’s the little details that make all the difference. Post-processing is where you can really make your print your own. It's like adding the final touches to a painting, it brings everything together and makes it shine. Don't skip this step! It can make all the difference.
Stage | Action | Key Considerations |
|---|---|---|
Planning | Sketch and design | Dimensions, functionality, fit |
Material Selection | Choose appropriate filament | Durability, application, environment |
Printing | Load model, adjust settings, monitor | Layer height, infill, initial adhesion |
Post-processing | Remove supports, sand, paint | Surface finish, aesthetics |
Essential Tools and Materials for 3D Printing Home Improvement
Essential Tools and Materials for 3D Printing Home Improvement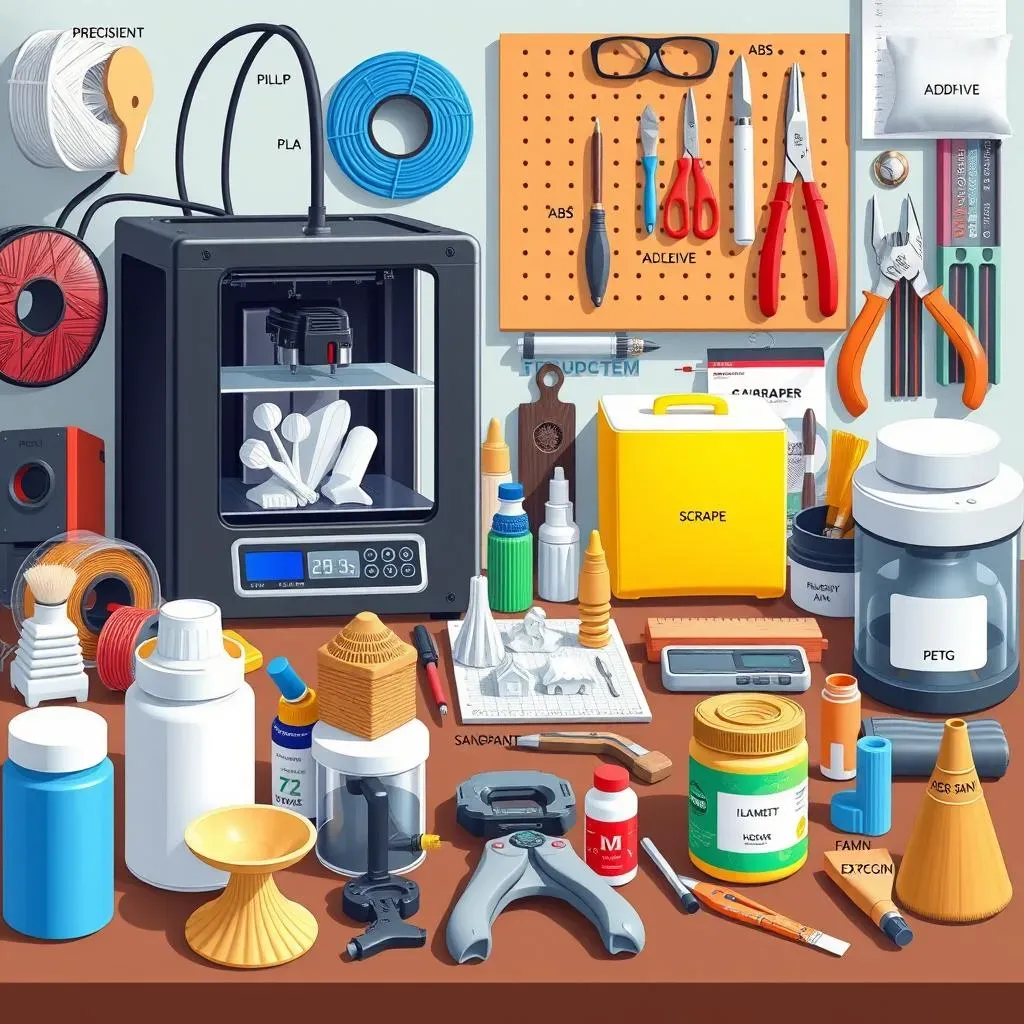
Gearing Up: The Must-Have 3D Printing Arsenal
Okay, so you're ready to dive into the world of 3D-printed home improvements, that's awesome! But before you get started, let’s talk about the gear you’ll need. First and foremost, you'll need a 3D printer, obviously. There are a ton of options out there, from budget-friendly models to high-end machines. I started with a basic printer and it worked fine for me, but do your research to find one that fits your needs and budget. It's like choosing a good tool for any job; you wouldn't use a butter knife to cut a plank of wood, would you? You also need filament, which is the plastic material your printer uses. PLA is a good starting point, it’s easy to print and relatively inexpensive. But you might also want to experiment with ABS, PETG, or other materials as you get more comfortable. Each has its own unique properties and uses, so it’s worth exploring.
Beyond the printer and filament, a few other tools will make your life a whole lot easier. A good set of precision calipers is essential for measuring parts accurately, and a set of needle-nose pliers and a scraper will come in handy for removing support structures and cleaning up your prints. You'll also need some kind of adhesive, like glue sticks or painter's tape, to help your prints stick to the build plate. And don't forget about safety! A pair of safety glasses and a well-ventilated space are must-haves. I once printed a whole batch of parts without proper ventilation and my room smelled like burning plastic for days. Trust me, it’s not pleasant. So, make sure you have a safe setup. It's like having a well-stocked toolbox; the right tools make the job easier and safer.
Tool/Material | Purpose | Why You Need It |
|---|---|---|
3D Printer | Prints your designs | The core of the operation |
Filament (PLA, ABS, PETG) | Printing material | Different properties for different uses |
Precision Calipers | Accurate measurements | Ensures parts fit correctly |
Needle-Nose Pliers | Removes support structures | Cleans up prints |
Scraper | Removes prints from bed | Keeps the bed clean |
Adhesive (glue/tape) | Helps prints stick | Prevents warping |
Safety Glasses | Protects your eyes | For safety |
Beyond the Basics: Nice-to-Haves
Once you have the basics covered, there are a few extra tools that can really take your 3D printing game to the next level. A digital scale is super helpful for weighing filament, especially when you are experimenting with different materials. It’s like having a recipe for your prints; you need the right measurements. A set of files and sandpaper will help you smooth out rough edges on your prints and get them looking extra polished. And if you plan on doing any painting, a good set of brushes and some paints designed for plastic are essential. I also highly recommend investing in a good set of storage containers for your filaments, to keep them dry and free from dust. It's like keeping your ingredients fresh; dry filament prints better. You might also want to consider a fume extractor or a filter system, especially if you plan on printing with materials like ABS that can release fumes. It's all about making the process more efficient, enjoyable, and safer.
Also, a good slicer software is crucial. While most printers come with basic software, exploring other options like Cura or Simplify3D can give you more control over your print settings and help you achieve better results. It’s like having an advanced editing suite for your 3D models. And finally, don't underestimate the power of a good online community. There are tons of forums, groups, and websites dedicated to 3D printing, and they’re a great resource for troubleshooting problems, getting inspiration, and sharing your creations. It's like having a support group of fellow makers; you can learn a lot from each other. So, don’t be afraid to connect and ask questions! It's all about continuous learning and improvement.
- Digital Scale
- Files and Sandpaper
- Plastic Paints and Brushes
- Filament Storage Containers
- Fume Extractor/Filter
- Advanced Slicer Software
- Online Communities
Troubleshooting and Tips for Successful Home Improvement 3D Prints
Troubleshooting and Tips for Successful Home Improvement 3D Prints
Common Hiccups and How to Fix Them
Alright, so you've got your printer humming, your design is ready, and you're all set to create that amazing home improvement project, but then, bam! Something goes wrong. Don't worry, it happens to the best of us. One of the most common problems is bed adhesion, where your print just won't stick to the build plate. It's like trying to glue something to a greasy surface; it just slides around. Try using a glue stick or painter's tape to help your prints stick and make sure your bed is properly leveled. I remember one time I was trying to print a large vase, and it kept popping off the bed mid-print. It was so frustrating until I finally got the adhesion right. Also, watch out for warping, where your prints start to curl up at the edges. This usually happens when there's a temperature difference between the print and the surrounding air. An enclosure for your printer can help with this, especially when printing ABS.
Another common issue is stringing, those annoying wispy strands of plastic that get left behind when the printer moves between different parts of your print. It's like a spider web has taken over your project. Adjusting your retraction settings and temperature can help minimize stringing. Also, don't forget about nozzle clogs. It's like having a blocked plumbing pipe, nothing can get through. Make sure your nozzle is clean and free of debris. I had a horrible clog once that took me hours to fix. It's all about learning from your mistakes and tweaking your settings. It's a bit of a learning curve, but once you get the hang of it, you'll be printing like a pro in no time. And remember, there are tons of online resources and communities that can help you troubleshoot any problem you encounter.
Problem | Cause | Solution |
|---|---|---|
Bed Adhesion | Uneven bed, poor surface | Use glue stick/tape, level bed |
Warping | Temperature differences | Use an enclosure, adjust bed temp |
Stringing | Incorrect retraction | Adjust retraction settings, temperature |
Nozzle Clogs | Debris, old filament | Clean nozzle, replace if needed |
Pro Tips for Amazing Results
Now that we've tackled the common problems, let's talk about some tips and tricks to really make your 3D prints shine. First, always double-check your design before printing. It’s like proofreading an essay, you want to make sure there are no errors. A small mistake in your design can lead to a big problem when it’s printed. I once printed a phone stand that was too small because I didn’t double-check my measurements. Also, experiment with different infill settings. Infill is the internal structure of your print and it affects its strength and weight. You don't always need 100% infill; sometimes 20% or 30% is enough, saving you time and material. It's like building a house; you don't need solid concrete walls everywhere, you need to strategically place support where it matters.
And finally, don't be afraid to experiment. 3D printing is all about trying new things, pushing the limits of your printer, and discovering new techniques. I once tried printing a flexible hinge using TPU filament, and it worked better than I ever imagined. It's like being a mad scientist in your own home; you get to create and experiment, and sometimes you stumble upon something amazing. So, keep learning, keep printing, and keep having fun. Remember, the best way to get better at 3D printing is to keep practicing. So, don't get discouraged by failures, they're all learning opportunities in disguise. And with a little patience and experimentation, you'll be creating amazing home improvement projects in no time.
- Double-check designs
- Experiment with infill
- Try different materials
- Learn from failures
- Join online communities
Wrapping Up Your 3D Printing Home Makeover
So, there you have it – a peek into the awesome world of home improvement 3D prints. It's more than just a hobby; it's a way to personalize your space, solve everyday problems, and maybe even impress your friends with your DIY skills. Remember, the key is to start small, experiment, and don't be afraid to fail a few times – that's how you learn. Whether it’s printing a new handle for a broken drawer or crafting unique wall art, the potential of 3D printing for home improvement is huge and continues to grow. So, fire up that printer, unleash your creativity, and get ready to transform your house, one layer at a time. Happy printing!